
The File Component in DataOps Suite is the initial step in data extraction after configuring the file-based data source. It is used to extract data from supported file formats such as CSV, XML, AVRO, JSON, PARQUET, and COBOL copybooks, and store the extracted data as a dataset for further use in workflows. Once the data is extracted through the File Component, users can proceed to perform various operations such as data processing, validation checks, and reconciliation.
After establishing a File source connection in DataOps Suite, create a new Dataflow or open any existing Dataflow to execute the file component and then, follow the steps below:
The "File" component wizard opens with the Properties page.
When you want to create or edit a File Component, navigate through the File Component wizard, set up Properties and File, and run the component.
This is the first step in configuring the File component. Here, you define the basic settings for how the component should behave.
A sample screenshot of the "File" component is shown below.
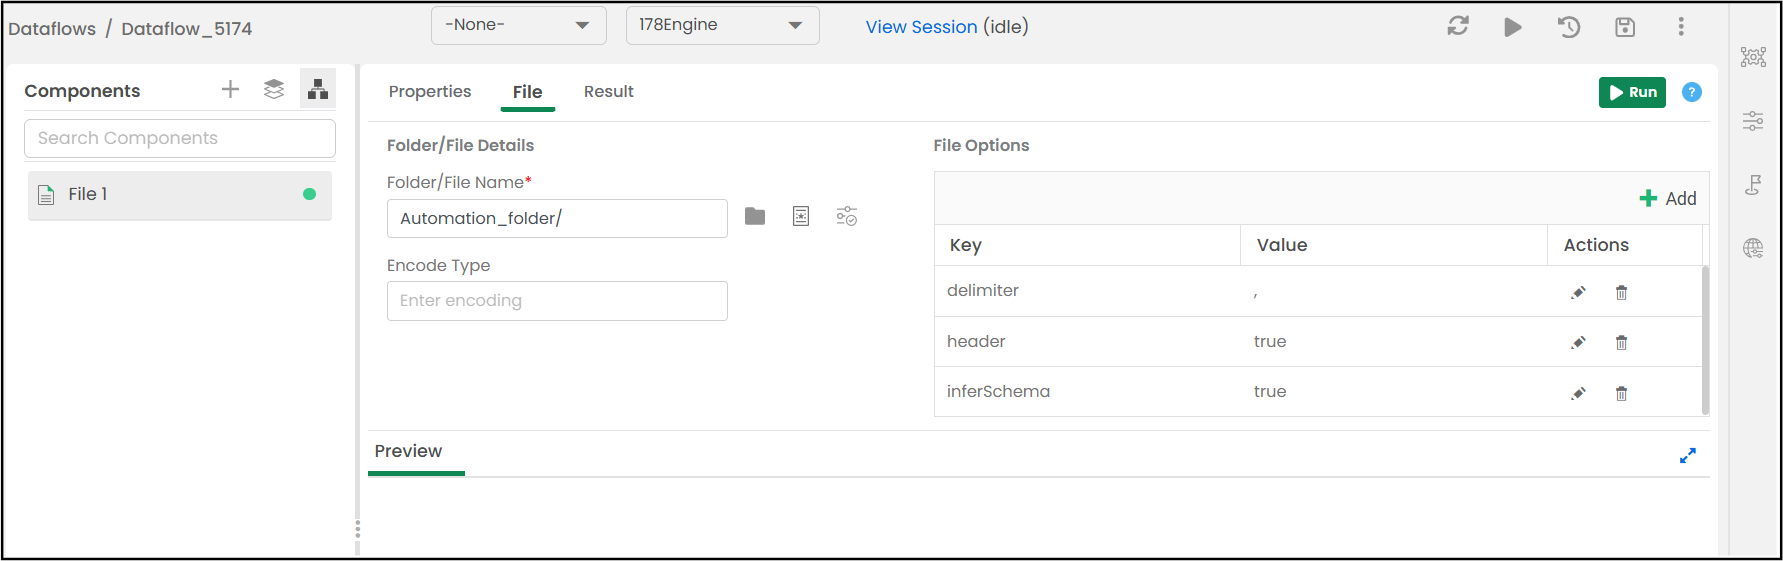
The "File" tab in the File Component is where users configure the details needed to read data from a fixed-length file.
The user must either select a file from storage (using the folder icon) or enter the file path manually. This is the source file to be read.
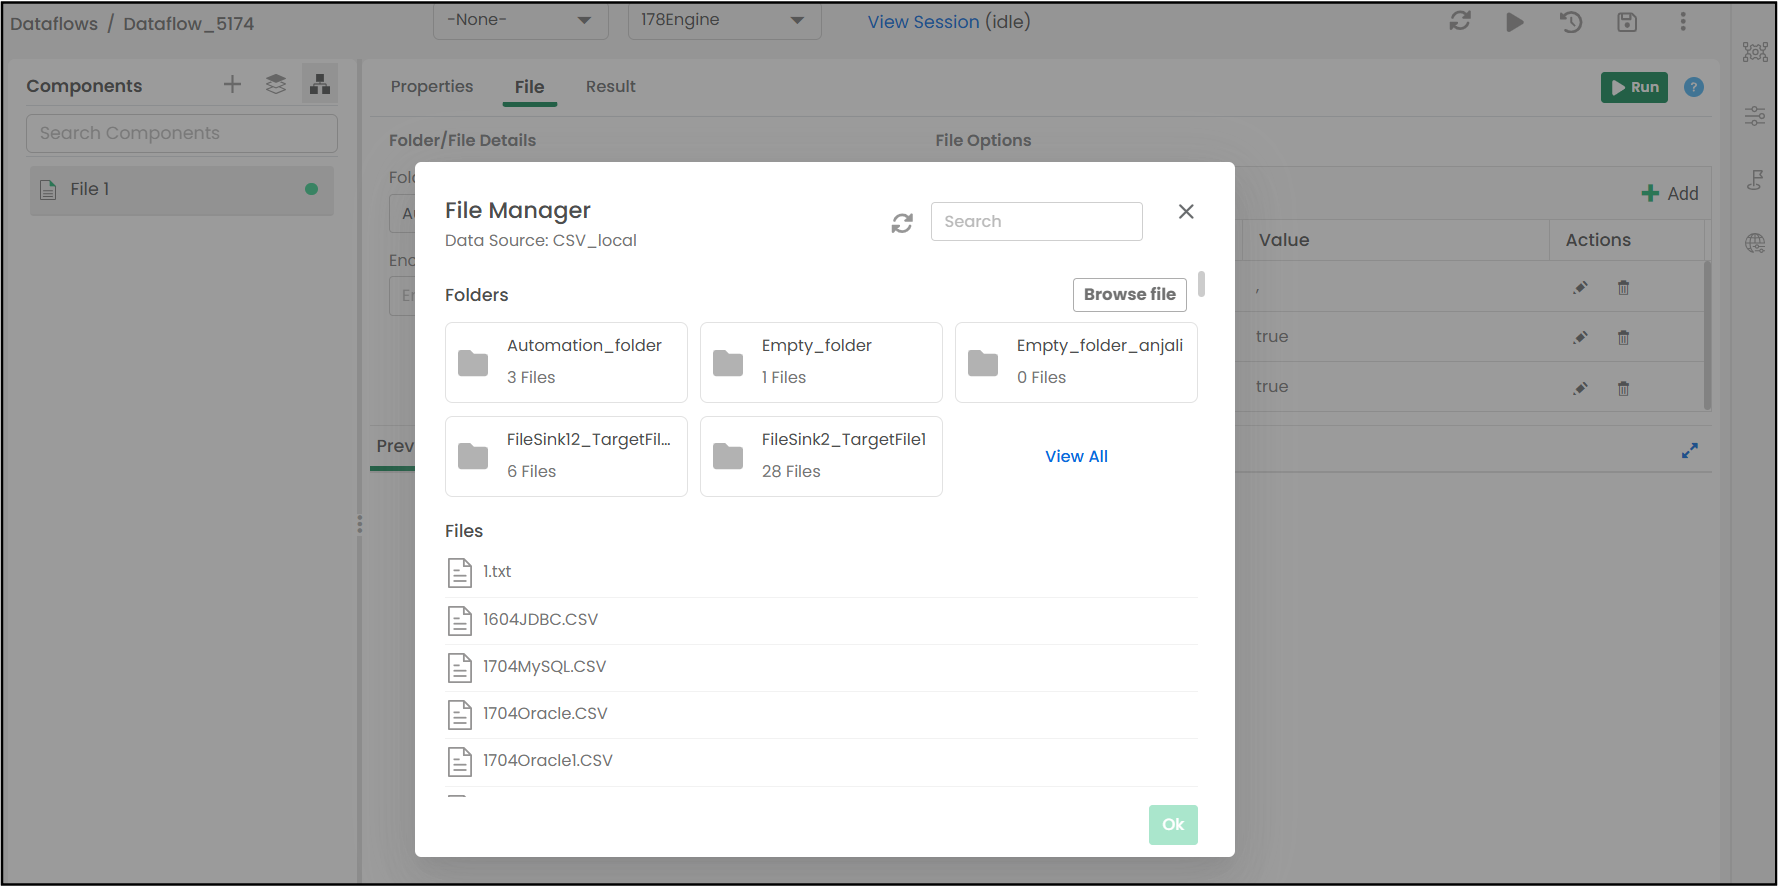
For a better file browsing experience, a File Manager has been implemented to support sub-folders and fetch data files or folders from S3 and Azure Data Lake System (ADLS), Shared, and Local file locations.
The user can upload any file from the local machine to the S3, ADLS, Local, or Shared file location using the Browse file button. The user can select any folder or file to fetch the data and then click the OK button.
A sample screenshot of the File Manager is shown below:
For the Files in the Shared Folder data source connection, it is possible to execute the folder now. A folder can have many files, so for a better output, it is important to maintain a similar structure of files. This functionality allows you to efficiently integrate data from multiple files within a single shared folder without needing to specify each file individually.
Example: Let us consider a CSV-shared folder data source connection (e.g., CSV_local) having an "Automation_folder" folder.
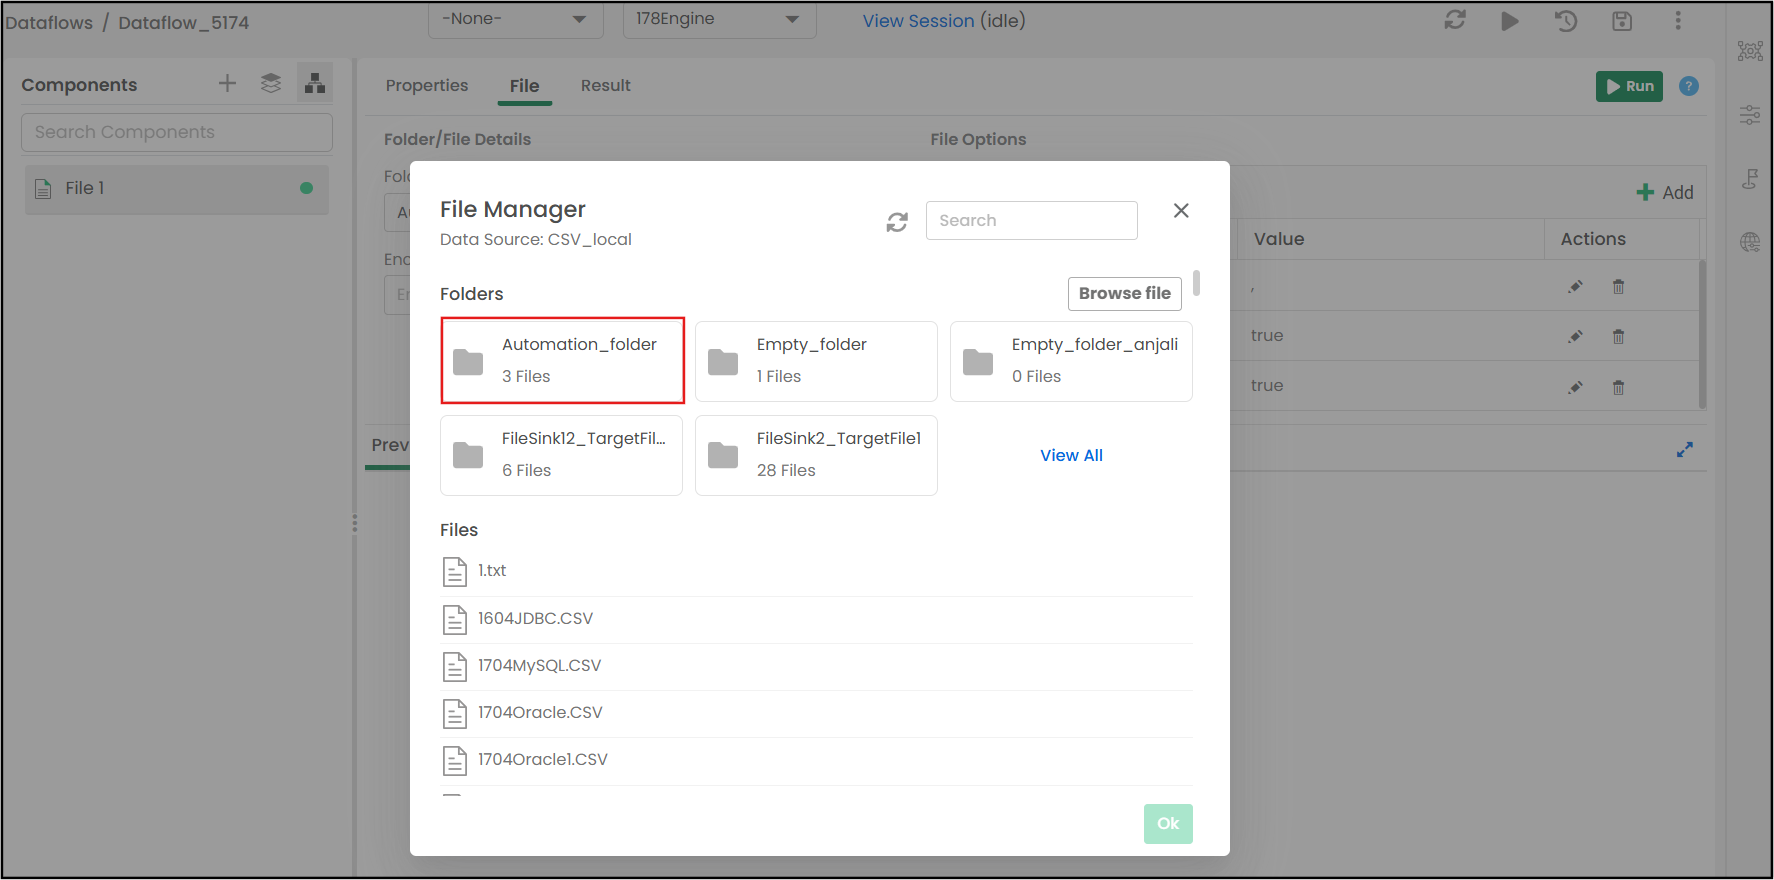
The folder “Automation_folder” is selected for the execution as shown below.
When you upload a file to the File Manager, the system checks if a file with the same name already exists in the selected data source location.
If a duplicate is detected, a warning message will appear:
"File Already Exists – Do you want to overwrite the existing file?"

You will then have two options:
Cancel: Stops the upload process and keeps the existing file unchanged.
Overwrite: Replaces the existing file with the new file you are uploading.
The read and write options for the selected file source will be displayed. Add new options or modify the existing ones. By default, you will see the options used while creating the data source connection. If there is a need to customize the options, use the add, edit, or delete buttons.
Detects the encoding format if the file source was created using an encoding character.
On the Result page, you can execute the File component and preview the results.
To run a component, perform any one of the following operations:
Or
When the component runs successfully, the status will be displayed as "Completed".
To preview the results, navigate to the following tabs:
This tab displays the data of the file. The user can customize the number of rows to display in the output. The default count is 50.
This tab displays the columns and their data type used in the query. The Download Schema icon allows users to download the schema information of the queried data in CSV format. This is particularly useful for understanding the structure and data types of the columns in the result set. This downloaded schema can then be used for further analysis that requires knowledge of the data structure. The user can also filter the columns and their data types for a quick search.
This tab displays query statements of SQL and Spark types. When the component is being run, you can see the status "queued" for the statements. Once the statement is run successfully, the status will be shown as "OK."
A sample screenshot of the output of the file component is shown below.

Dataflow actions are the fundamental operations the user can perform on dataflows. These actions allows the user to perform various actions, such as adding components, viewing datasets, switching to diagram view, downloading the full dataset, and accessing more options.
For more information on Dataflow actions, click here.
A sample screenshot of the various "Dataflow Actions" (highlighted) is shown below.
| Previous | Next |